Having more inbound leads than you can quickly reply to is a great problem to have. With Zapier and ChatGPT, you can save time by automatically generating reply emails to incoming leads. From there you can either save the pre-generated reply to your CRM or reply directly to the email.
This post will focus on how to generate email replies with ChatGPT and Zapier to incoming leads from a contact form. But, you could use these same tools to reply to customer support inquiries or generate automated emails with AI for so many other use cases.
Step-by-Step Process to Automate Contact Form Replies with Zapier
To set up this automation, you'll need a Zapier account and an email address where your incoming leads are sent to.
This guide assumes your inbound leads are delivered to you with this typical setup:
- A user submits a form on your website with their contact information.
- An email is sent to you with the form submission information.
- You reply to the user's contact form submission with an email.
With this setup in mind, this guide will go through each step to set up a fully automated system that can handle replying to leads for you.
1. Create a Gmail Trigger
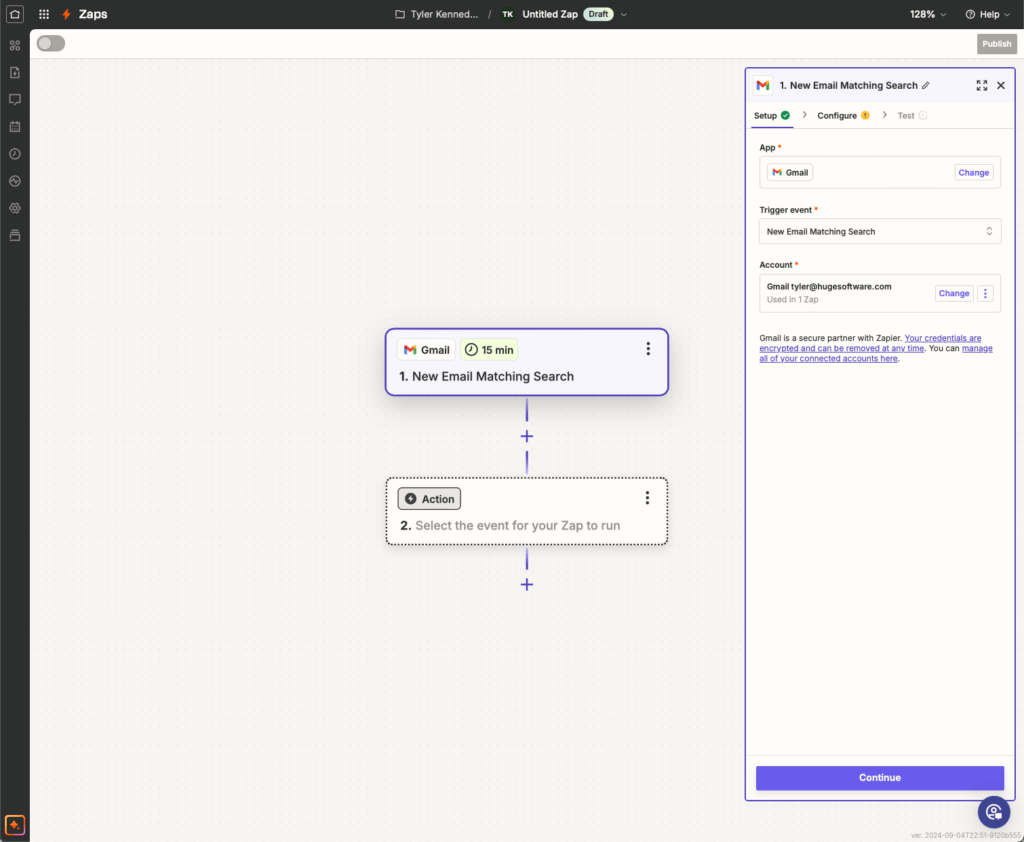
The first step is to create a new Zap automation workflow and set up a trigger in Zapier. The automation will kick off when you receive a new email that is a contact form submission.
To do this, create a trigger in Zapier that uses the Gmail app and set the Trigger Event to 'New Email Matching Search'. This allows Zapier to trigger the automation workflow when you receive a new email matching a search criteria we will set up later.
Once you create the trigger, your Zap should look something like this:
Connect Your Gmail Account
Under account, you'll need to select the Gmail account that receives the contact form submissions. You can select your account if you already have it connected to Zapier or log in with Google. If you need to add your account, clicking Connect a new account will open a secure Google login page.
Filter for Contact Form Submissions
After connecting your account, you need to configure the trigger so it only runs when a lead submits the form. You don't want this automation to run on every email you receive in your Gmail account, only when the email is a form submission.
Note: You can skip this step if the email account you connected is only used to receive the lead form submissions.
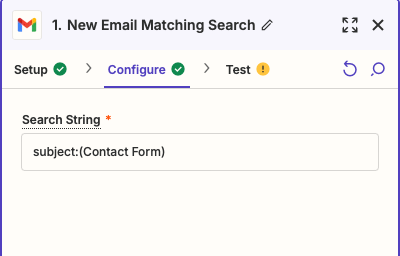
Click the Configure tab at the top of the trigger. You'll need to enter a search string that will filter for only your lead form submissions. This will be unique to you depending on what your form submission emails look like. Here are a few common search strings:
- Subject - The subject line for your lead form submissions is probably the same for all leads. The search string subject:(contact form) will filter all emails with that subject. You can swap out for the subject line of your emails.
- Labels - If you have an inbox rule in Gmail that applies a label called 'Contact Form' to lead form submission emails, the search string label:contact-form will grab those emails
If you need additional help creating a search string to grab your lead form emails, reference this Google support document or ask ChatGPT to help you generate a search string for Google by describing the format of your email.
After you configure the search string, test it and verify if Zapier is able to get the last email matching your search criteria.
2. Generate a Reply to Lead Form Submissions with ChatGPT
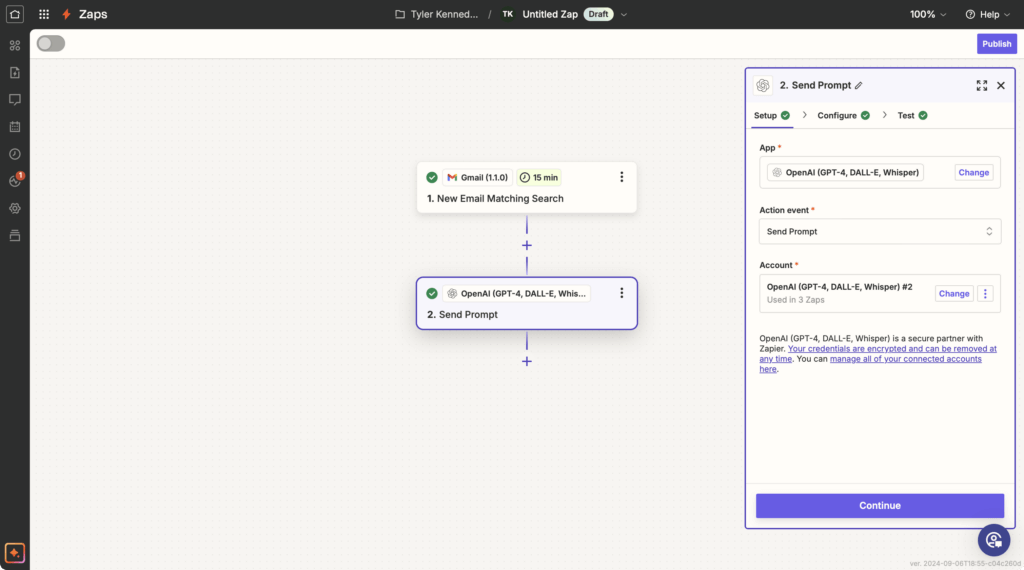
Next, we need to generate a reply to the incoming email with ChatGPT.
Create a new action that uses the OpenAI app and select 'Send Prompt' as the Action Event. This allows the automation to connect to ChatGPT and send the contents of the email form to generate a reply.
Create an OpenAI API Key
To connect to your OpenAI account with Zapier, you need to create an OpenAI API key. This OpenAI support document explains how you can create an API key.
Once you create an API key, connect your account inside Zapier by clicking 'Connect a new account' and entering the API key in the popup window. After you connect the account, you will be able to verify it connected correctly in Zapier.
Generate a Reply with ChatGPT
To generate a reply to the lead form email, click the Configure tab at the top of the side panel. For Model choose 'gpt-3.5-turbo-instruct' and leave all of the other fields as their default values. In the next step, we will fill in the prompt field.
ChatGPT Prompts to Generate an Email Reply
For ChatGPT to generate a reply to your email, you will need to prompt it with the contents of your email. Here is an example of a prompt you could use:
You are an account executive at <company>, a company that offers <service you offer>. Your task is to handle incoming lead form submissions and write a reply email to help the customer with their request, answer questions, or ask additional follow up questions.

Use these rules to write your reply email:
- Always greet with "Hello {name},".
- Write in a clear and concise manner.
- Be direct and informative.
- Use casual but appropriate language for a business interaction.
- Sign your email with "Best, {your name}".

Generate a reply to this email:
"""
<Lead Form Email Goes Here>
"""
You can fill in this prompt with the relevant details for your company and make any adjustments. You might want to add extra instruction or details about what you want to include in your response emails. Here is an example for a graphic design studio.
You are an account executive at Good Graphics, a company that offers graphic design services. Your task is to handle incoming lead form submissions and write a reply email to help the customer with their request, answer questions, or ask additional follow up questions.

Use these rules to write your reply email:
- Always greet with "Hello {name},".
- Write in a clear and concise manner.
- Be direct and informative.
- Use casual but appropriate language for a business interaction.
- Sign your email with "Best, Tyler".

Generate a reply to this email:
"""
<Lead Form Email Goes Here>
"""
Notice that the part where the email content goes still needs to be filled in. Back in Zapier, fill in your prompt in the prompt field using the example prompt above or your own.
To make sure that ChatGPT has the contents of the lead form email to generate a reply, you need to include that information in the prompt.
- Inside the example prompt, delete the text '<Lead Form Email Goes Here>'.
- Click to place the cursor where that text was between the two sets of triple quotes.
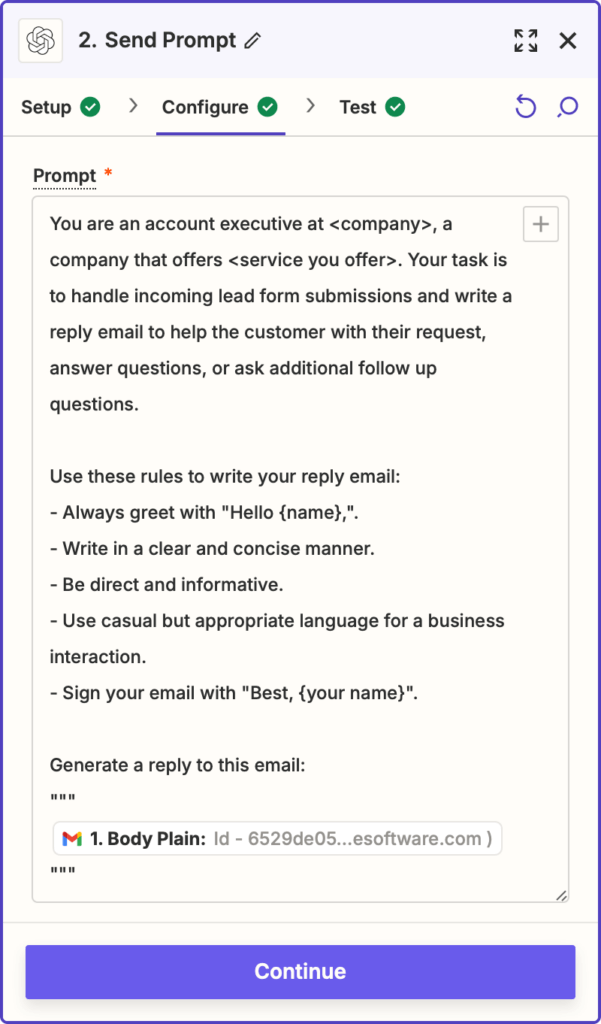
- In the top right corner of the prompt field, click the plus icon to 'Add field mappings'. This allows you to insert the contents of the incoming email into the prompt so ChatGPT can write a reply.
- From the popup showing the email from the previous step, select 'Body Plain'. This is the contents of the lead form email.
After completing these steps correctly, the prompt field should look like this:
Now your prompt will be sent to ChatGPT with the contents of the lead form submission email.
In the test tab, you can run the step and view the results that ChatGPT generates. If the reply that ChatGPT generates seems generic and lacking specific details of the incoming email, make sure you correctly inserted your email content.
3. Send or Save the Reply Email
Now that AI has generated a reply to your incoming lead form submissions, it is up to you how to use the reply.
I would caution you against setting up this automation to send the AI generated reply directly to your leads. You always want some form of human supervision when using AI and before sending it directly to your customers.
Instead of sending the reply directly to the lead, here are a few ideas for how you can use the AI reply in Zapier:
- Save the lead and the generated reply in your CRM software.
- Create a new card in Trello or other task management tool to follow up with the lead.
- Save the lead to a Google Sheet with the generated reply.
- Add the lead to a Notion table.
- Forward the email to your sales team with the generated reply copy so they can personally follow up with the lead.
To finish out this guide, we will use Zapier to save the AI generated reply in Gmail as a draft, so you can manually review and edit the email before responding to your lead.
Save a Draft Reply in Gmail
To save a Gmail draft reply, add a new step to your automation after the OpenAI step. In the new action choose the Gmail app and select 'Create Draft Reply' as the Action Event.
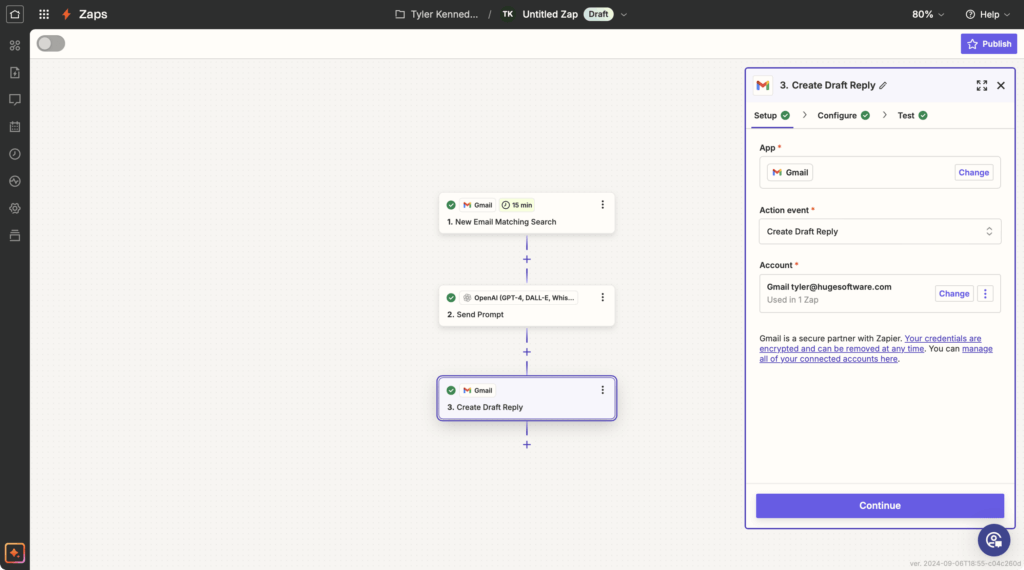
Click the Configure tab at the top of the side panel to set up the reply email and add these settings:
- For the thread field, click the plus icon to 'Add field mappings'. From the drop down, select the email from first step and choose the 'ID' field. This will link the incoming email so Zapier knows which email to create a draft reply for.
- In the To field, use the plus icon to 'Add field mappings', click the drop down, select the email again, and choose the 'From' field to reply to the original sender.
- For the From field, click the drop down to choose your own email address to reply with and enter your name in the From Name field. For the Body Type choose 'Plain'.
- In the Body field, again use the plus icon to 'Add field mappings' and now select the OpenAI Send Prompt from the second step and choose the 'Response' field. This takes the response from ChatGPT and inserts it as the body content of the draft reply in Gmail.
Publishing Your Zapier Automation
After completing this step, your automation is ready to go. You can run the test in Zapier and you should see a draft reply created in your Gmail account to the incoming lead form. You can now publish your Zap and this automation will run each time you get a new incoming lead form submission.
If you have question about setting up your Zapier automation or want to learn more about creating other automations like this with Zapier reach out to see how we can help.